# How to use the Bridge?
## Introduction
The bridge can be configured and integrated into the deployed Thanos stack. Its key functionality includes Deposit/Withdraw support for ETH, Native token, USDT, and USDC. You can learn more about the thanos bridge here. As the code is open source, operators and developers can extend its functionalities to suit their specific needs.
## Quick User guide
After you deploy the thanos bridge following the Thanos stack deployment guide, you will get the public domain of that bridge where you can move assets across Layer1 and Layer2.
### Prerequisites
You should have the Metamask wallet installed in your browser. ([guide](https://support.metamask.io/start/getting-started-with-metamask/#how-to-install-metamask))
**Wallet connect**
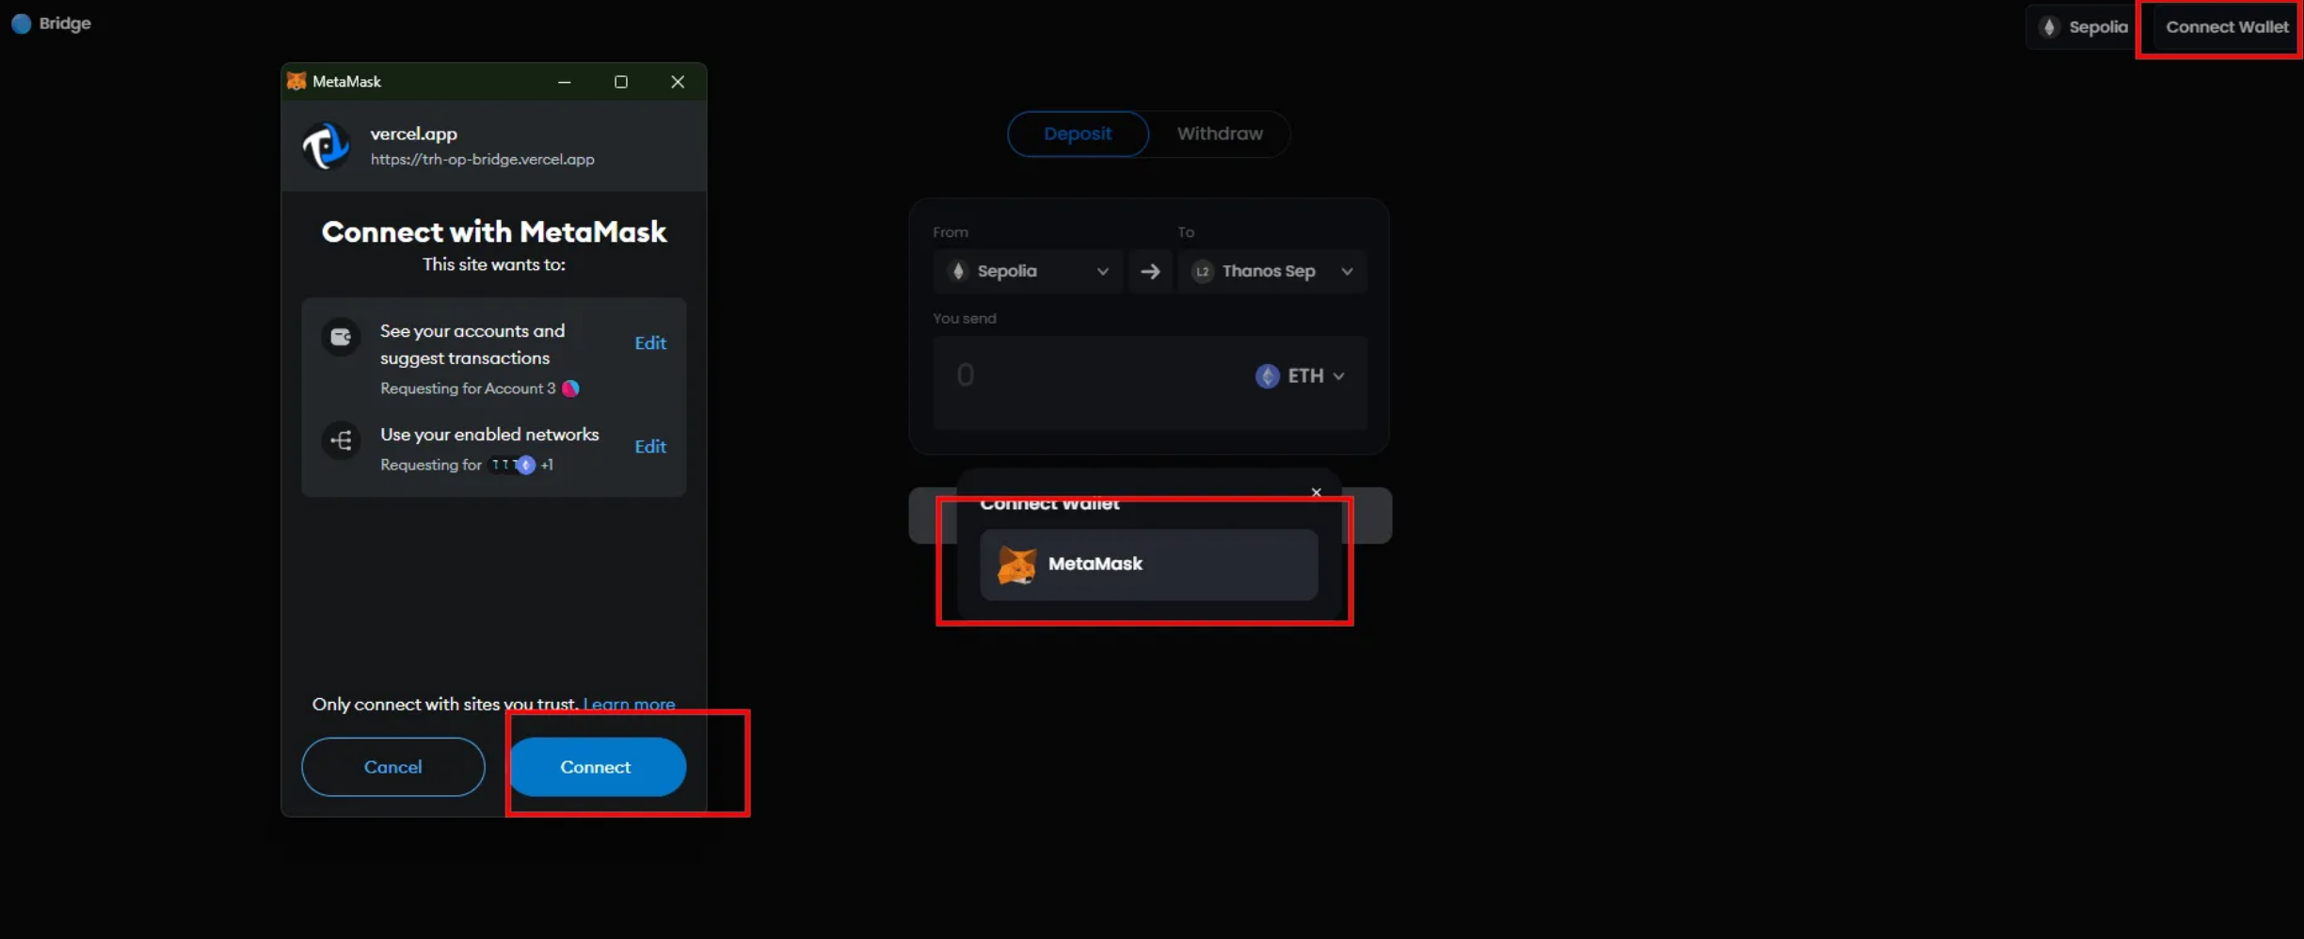
1. First things first, you can connect your account by clicking `Connect Wallet` button to use the bridge.
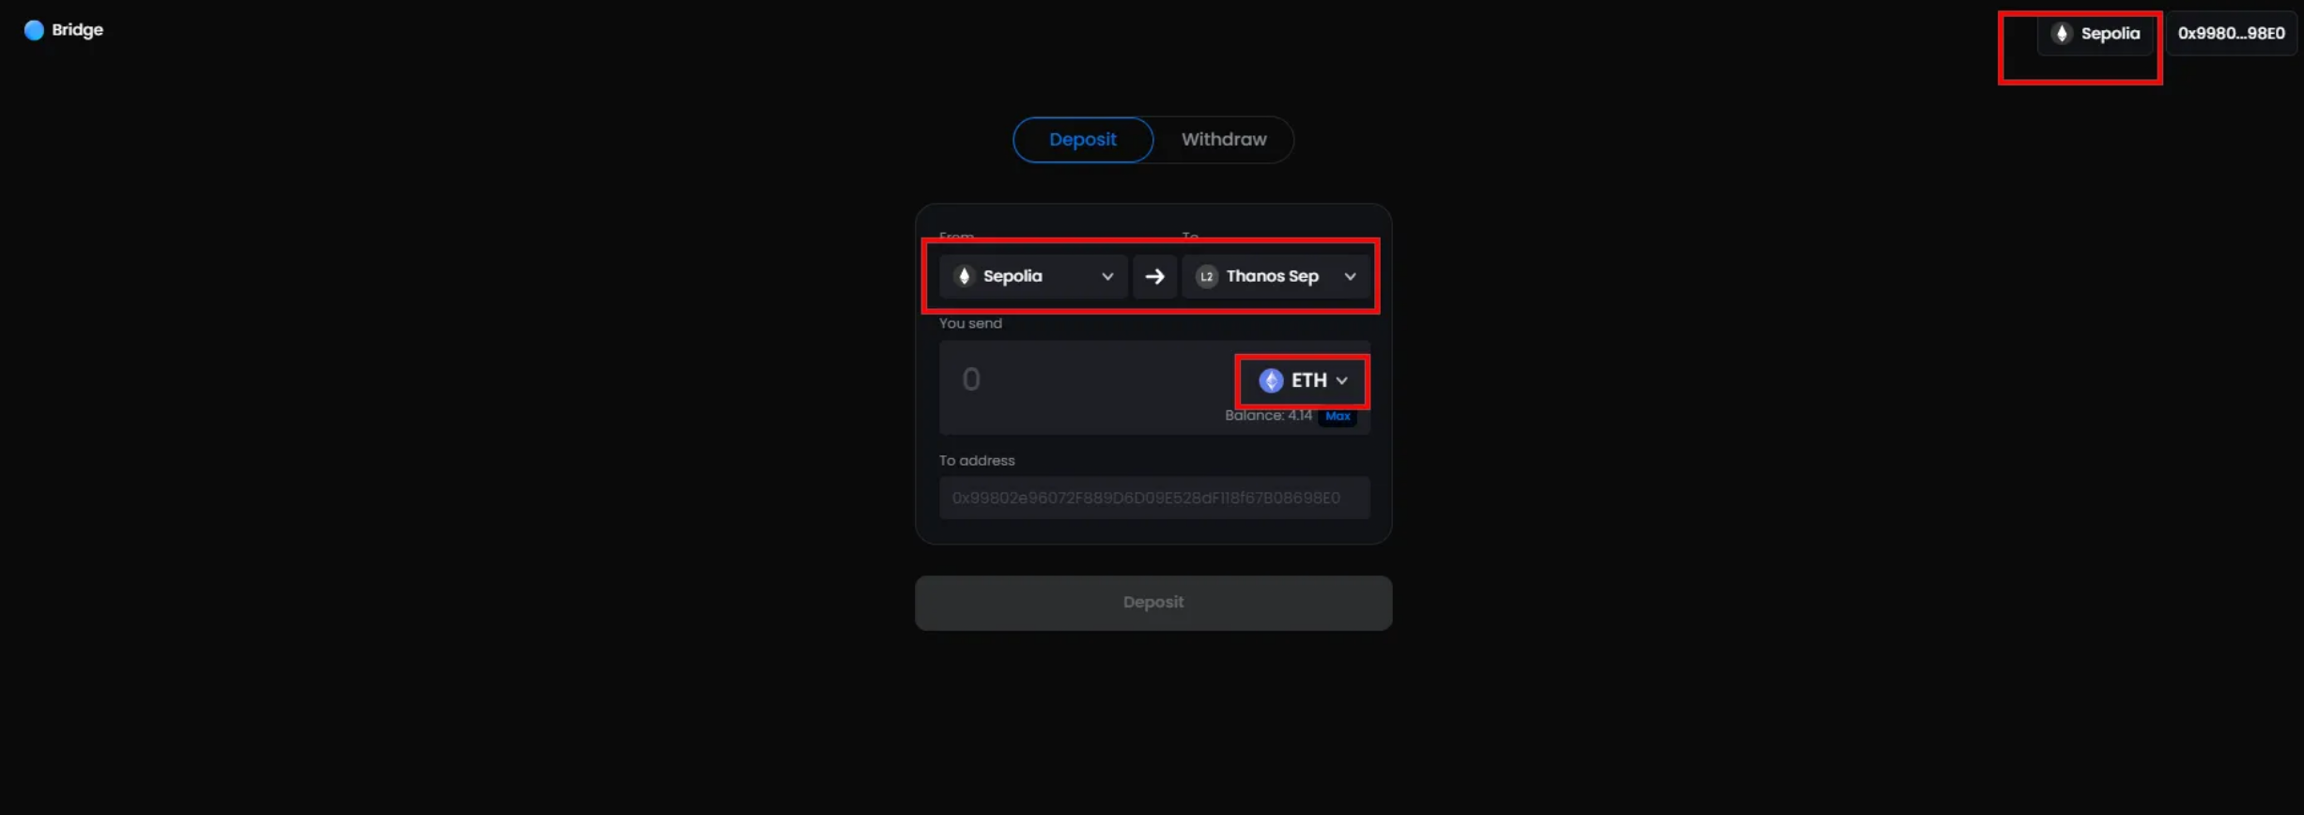
2. After you connect your account into the bridge app, you can change the network(L1 & L2) connected and also able to see the token balance of your account.
### **Deposit(L1 → L2)**
1. Click the `Deposit` tab or set the L1 network chain connected to deposit tokens to the L2 network.
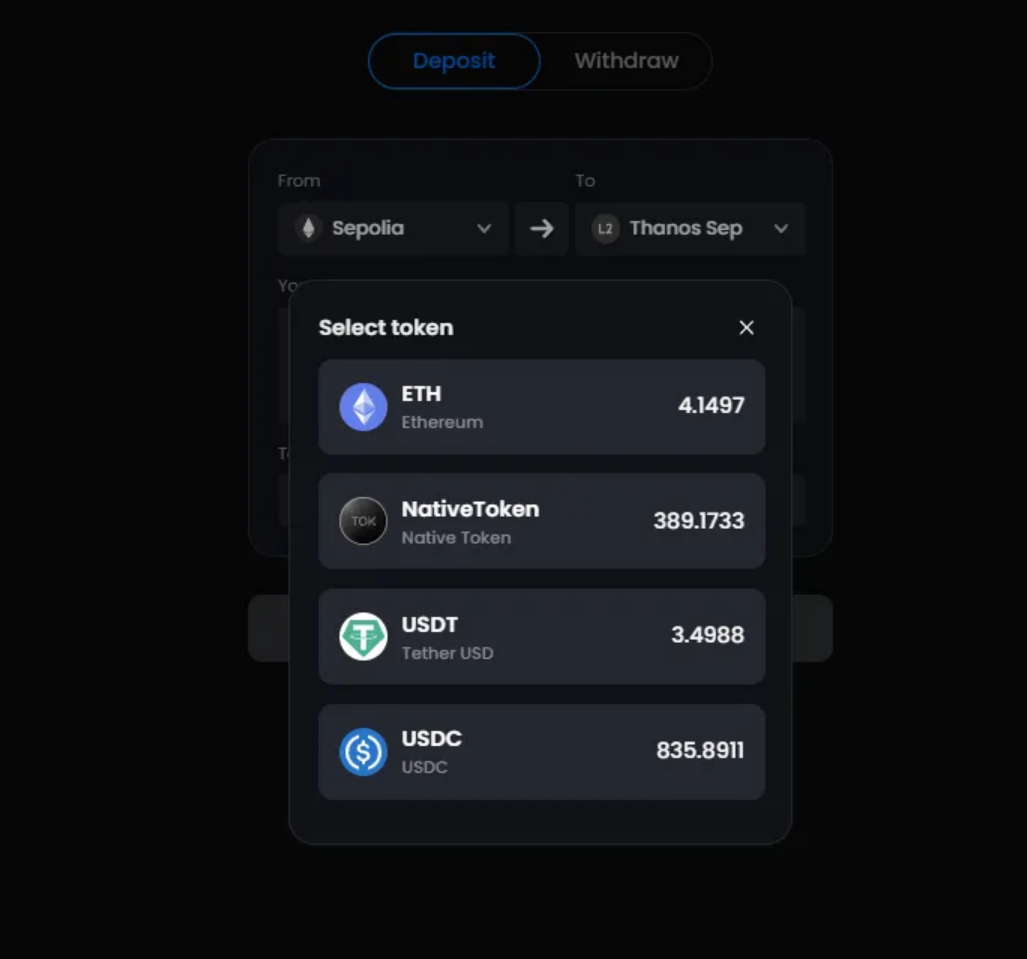
2. Select the token and input the amount to deposit. `To address` is the address to be deposited; it is your current account as a default, but you can put another account if needed. (pic1: connected account, pic2: another account)
3. Click `Deposit` button for ETH deposit and you will need to approve them in case of the other tokens (Native token, USDT, USDC). After the transaction has been confirmed, you will get the link of that transaction.
### **Withdraw(L2 → L1)**
The withdrawal process contains 3 steps (initiate, prove, finalize) based on Optimistic rollup.
1. Initiate
1. You can initiate a withdrawal transaction by clicking `Withdaw` → `Initiate` tab and the operations(token selection, input amount, input address to send, etc) are same as what we did for the deposit process.
2. After the transaction has been confirmed, you will get the Tx hash which will be used for `prove` and `finalize` process.
2. Prove
1. You can check the status of your withdrawal transaction in [Layer2 block explorer](https://explorer.thanos-sepolia.tokamak.network/withdrawals) that you deployed in the previous rollup deployment steps.
b. Once the transaction is ready to prove, you are ready to prove it. Click `Prove` tab and input the hash of the initiated transaction. Click `Prove` button.
3. Finalize
1. Check the status of your withdrawal transaction in Layer2 block explorer and it should be `Ready for relay` to be finalized.
2. Go to `Finalize` tab and input the hash of the initiate transaction. Click `Finalize` button.
## Troubleshooting
1. If you are using an http RPC url for the L2 rollup, instead of https, you will need to manually add the L2 network to your metamask.
1. Open the metamask extension in your browser, click on the network dropdown on top left corner and click `Add a custom network`.
2. Get the following details from bridge app and fill in the form.
1. Network Name
2. New RPC URL
3. Chain ID
4. Currency Symbol
5. Block Explorer URL (Optional)
2. Network switch issue in case of http L2 RPC url. If you want withdraw or prove/finalize the withdrawals, you need to switch the network to the L2 rollup network. In this case, if you have http L2 RPC url, you will need to manually switch the network in your metamask.
After switching the network, you will see the network has been switched to the L2 rollup network successfully and you can continue with the withdraw or prove/finalize process.
---
# Agent Instructions: Querying This Documentation
If you need additional information that is not directly available in this page, you can query the documentation dynamically by asking a question.
Perform an HTTP GET request on the current page URL with the `ask` query parameter:
```
GET https://docs.tokamak.network/home/service-guide/tokamak-rollup-hub/tokamak-rollup-hub-sdk/rollup-stack/thanos-stack/integrations/bridge/how-to-use-the-bridge.md?ask=
```
The question should be specific, self-contained, and written in natural language.
The response will contain a direct answer to the question and relevant excerpts and sources from the documentation.
Use this mechanism when the answer is not explicitly present in the current page, you need clarification or additional context, or you want to retrieve related documentation sections.